So. You opened your Doorstep Barista box and have a couple new beans to choose from. You carefully compare tasting notes and origin, descriptions and…processing methods? What are those??
Processing is everything that happens to the bean in the time between harvesting and being shipped off to roasteries. Previously, we covered the three basic types of processing methods—washed, natural, and honey—which you can find here (we reference it, so it’s worth a quick read if you don’t already know). This month, we turn to experimental processing methods, which are relatively new and uncommon processing methods in the specialty coffee industry.

Something else to clarify: the following experimental processing methods can generally be considered “add-ons” to the basic processing methods (those being washed, natural, and honey). For example, “lacto-fermentation” isn’t a process in and of itself, but something used in conjunction with a washed, natural, honey process. So, while it’s not entirely accurate to call them “processes,” the term is used nonetheless since these procedures occur simultaneously.
And now what we all came here for:
1. Anaerobic Fermentation
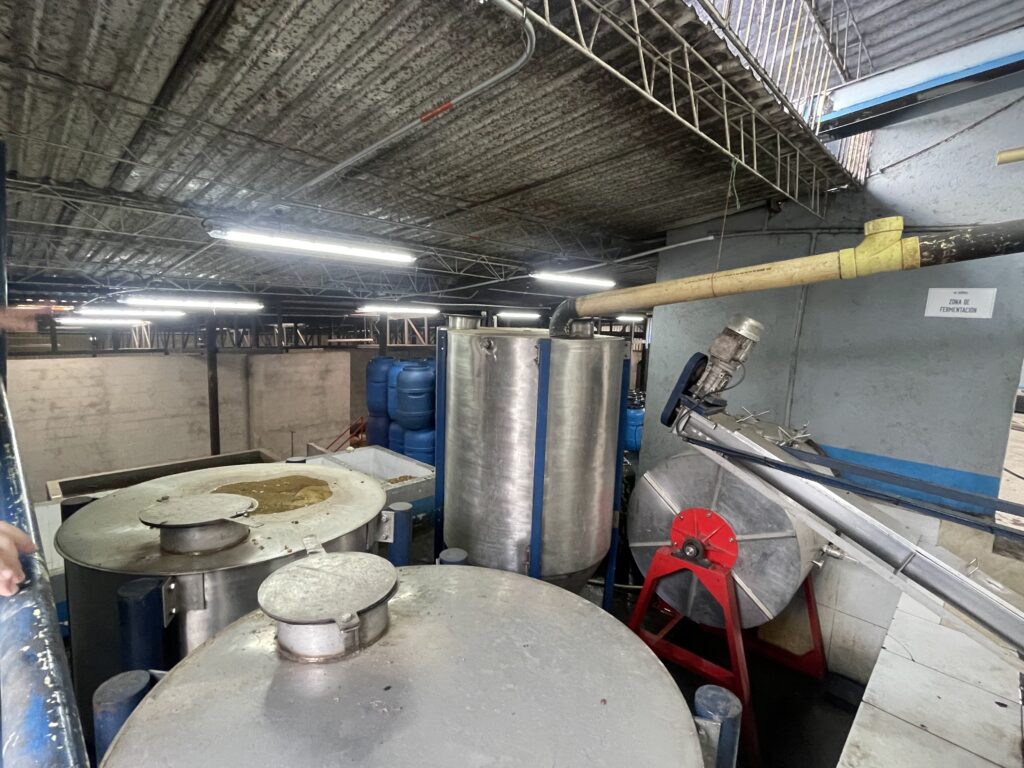
This first one crops up frequently. “Anaerobic” means “without oxygen”; in the coffee processing world, it’s when the coffee bean is fermented in an environment without oxygen. This can occur at any stage during processing, and involves placing beans in sealed barrels with one-way valves. As the fermentation gasses build up, they push oxygen out of the barrel and through the valve, creating an anaerobic environment, and allowing fermentation to occur at a slower pace. The result often depends on if a washed, natural, or honey processed bean is being used, but generally, anaerobic fermentation creates a heavy body with winey or fruit tasting notes.
2. Thermo-Shock
Thermo-shock is a procedure where beans are cycled through dramatic temperature changes at any stage of processing. Temperatures can drop as low as -50°C to -80°C, then swing rapidly to temperatures as high as 30°C to 60°C. This is achieved with dry ice, liquid nitrogen, or cold/hot washing, and results in a more nuanced taste profile.
3. Double and Triple Fermentation
As the name suggests, this is when the bean undergoes two or three rounds of fermentation at different stages of processing. Originating in Kenya as a means of simply storing coffee beans in water until enough space is available to spread them out and dry, it soon became a valuable addition to processing as a means of developing flavour profiles. Often fermentation will occur the first time when the coffee cherry is depulped, and then again when the mucilage is removed. After the second period of fermentation, the bean is washed and, in the case of triple fermentation, this is when the bean is once again fermented.
4. Lacto-Fermentation/Lactic Process
This fermentation process utilizes the specific bacteria called lactobacillus. Coffee cherries are placed in an anaerobic container to ferment, and the pH levels, oxygen levels, and temperature are all closely monitored to ensure the ideal growing environment for lactobacillus. The cherries most often used for this are ones with a high Brix (measurement of sugar content) degree and pH readings, as these help with the fermentation. It is an 80-hour process, minimum. After fermentation, cherries are washed to remove mucilage, then dried. The result is usually a coffee with medium to high body, and increased sweetness.
5. Co-Fermentation
This is a slightly controversial method within the specialty coffee industry. Some people understand this method to be adding ingredients during fermentation or drying in order to flavour the coffee. So, how can you truly taste the bean itself if it’s masked by added flavours? In reality, co-fermentation is the addition of ingredients to create a specific bacterial culture for fermentation, either before or during fermentation. Depending on the ingredients’ pH levels and sugar content, different bacterial cultures are created, which affect how the bean ferments and its flavours develop. Co-fermentation is not the same as infused or flavoured coffee.
6. Carbonic Maceration
Here we arrive at our final processing method: carbonic maceration, a technique borrowed from wine making. It’s another anaerobic fermentation, but specifically uses carbon dioxide. When the coffee cherries are placed in fermentation tanks and sealed, CO2 is pumped into the tank, pushing the oxygen out. The presence of CO2 reduces the oxidation of fruit that can occur in open-air fermentation, and utilizes a different metabolic force than other fermentation processes to soften the tissue of the coffee cherry.
Many of these experimental methods produce coffees that have complex, funky, and unconventional flavour profiles, making them highly sought after in the specialty coffee industry. But, the increased complexity of these methods also increases the risk a batch spoiling. Furthermore, producers are required to have specific and expensive equipment; an extensive knowledge of each variable; and have a desired outcome in mind—meaning producers need to have the means to cup their coffees, when, in fact, most never taste their own coffee. Labour costs for extended processing and closer monitoring also increase. Ultimately, the cost, risk, and knowledge factors decrease the accessibility and desirability of these methods for producers.
More and more experimental processes continue to develop and gain popularity. This is by no means an exhaustive list, but hopefully we’ve provided a solid foundation to understand what it means when beans are “processed” and how it can affect flavour profiles.
Here, our two-part series concludes—thanks for sticking around!
In the series of events that occurs in order for us to obtain our daily cup of coffee, the processing stage is one that has lately been at the forefront of the world of specialty coffee. While it’s always been a necessary step in the coffee production chain, new and exciting processing methods have been emerging left, right, and centre as ways to elevate that daily cup of bean water. Ever looked at a bag of coffee and wondered what lacto-fermentation is? How about carbonic maceration? Because this overload of new techniques can be overwhelming, we at Doorstep Barista thought we would break these all down for you so you know exactly what you’re sipping on when you open your Doorstep box every month. This month’s blog post will start with the three most common processing methods, and next month will focus on those fancy schmancy other ones.
So, to begin: what is processing?
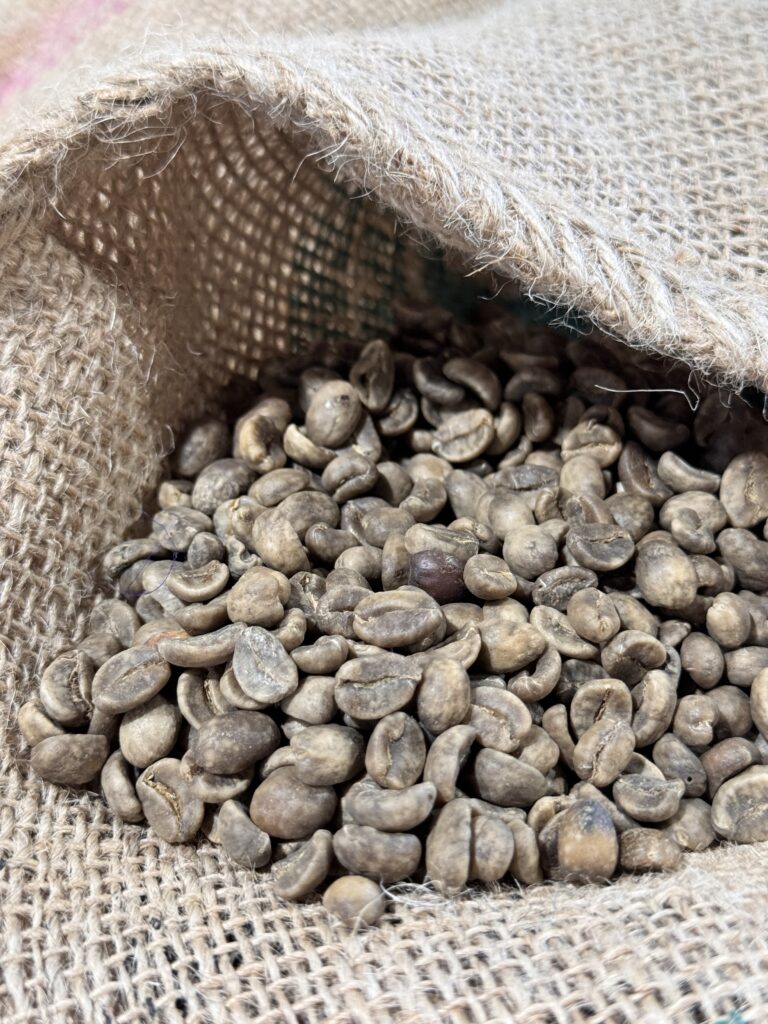
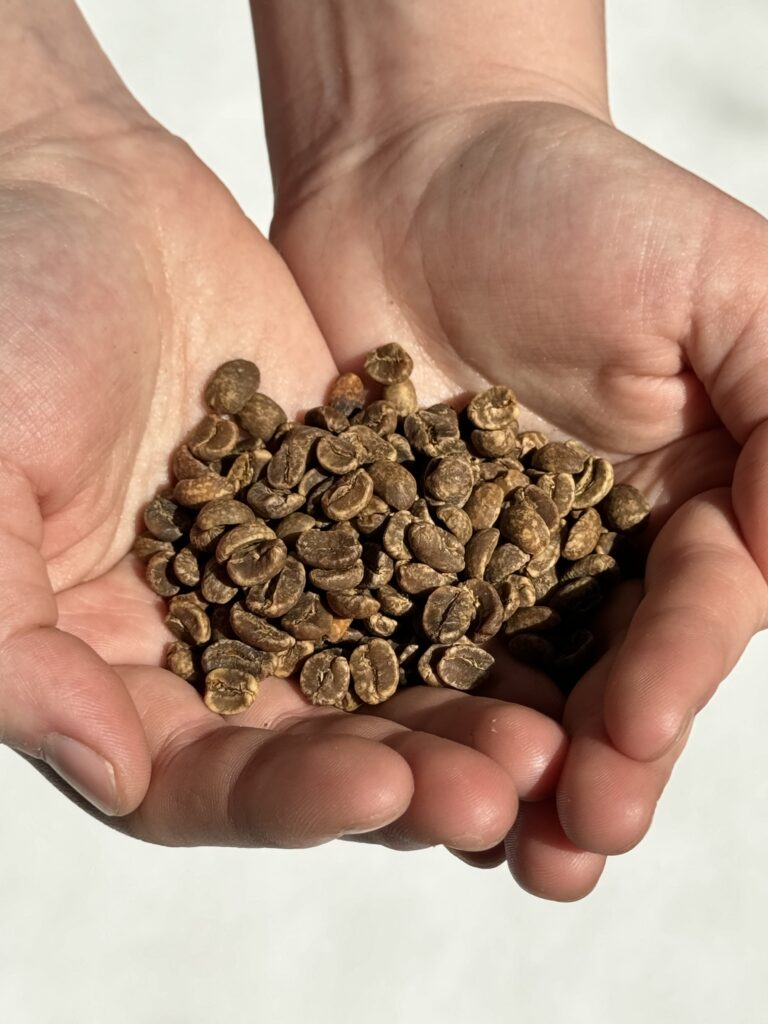
Processing refers to the stage in coffee production where the coffee cherry is removed from the pit—which is actually the green coffee bean!— and the green bean is then dried. Variations in processing methods generally occur in terms of how and when the pulp is removed from the bean, and how the bean is dried, all of which affect the final flavour.
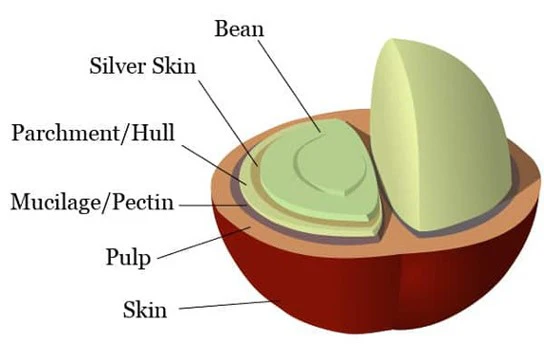
The next thing to know before jumping into processing methods is the parts of the coffee cherry. The cherry is formed of several layers (illustrated below) and these are the specific parts we will be referring to as we go through the different methods.
And now, we turn to the three most common processing methods!
Natural (or Dry) Process
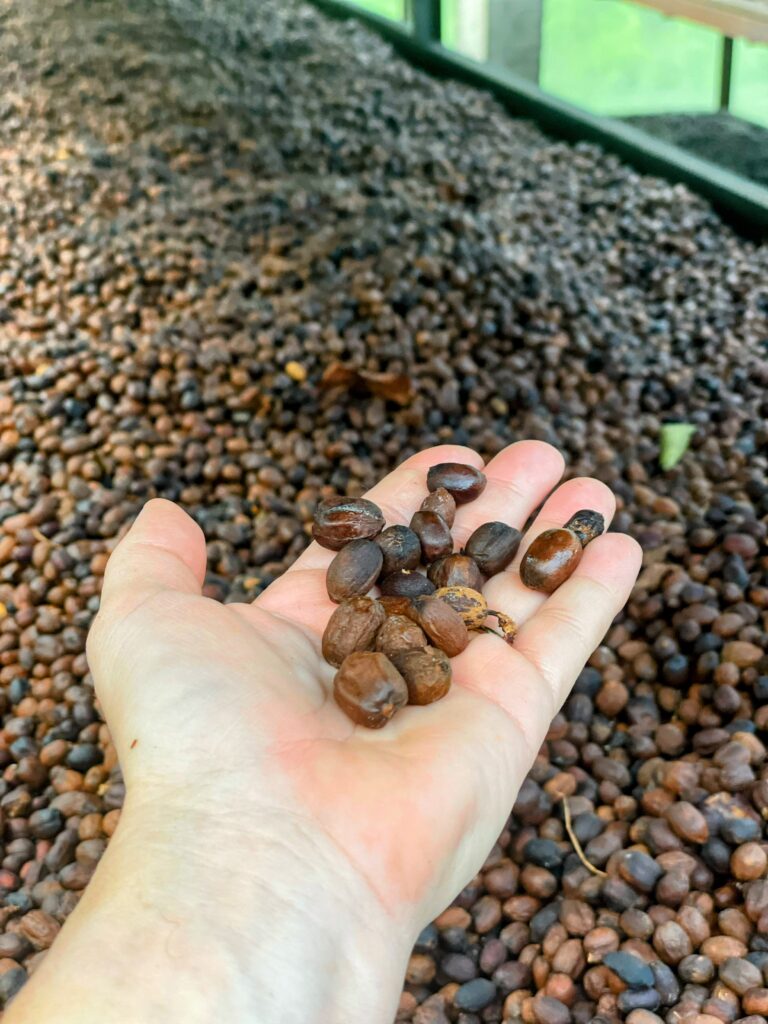
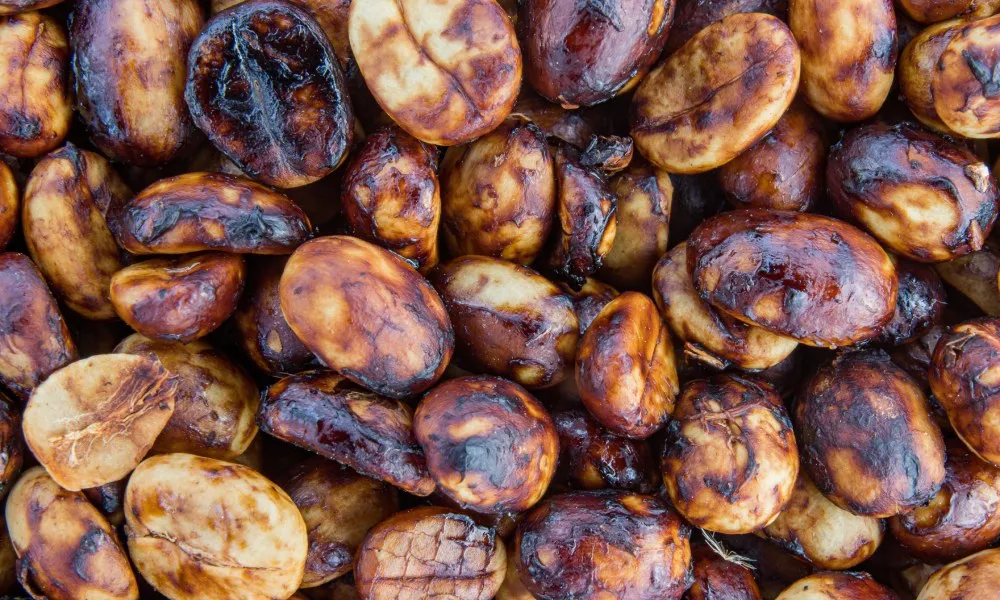
After the coffee cherries are harvested, they are laid out to dry, either on the ground or raised beds. Over the course of up to 6 weeks, the cherries are regularly turned to prevent rotting while still allowing for fermentation as the pulp imparts its sugars and fruit flavours to the green bean. Once dried completely, the skin, pulp, mucilage, and parchment/hull are removed, and the green bean is ready go.
There are several advantages to the natural process. First is that, for the producer, this is an especially accessible method because it requires no special machinery or facilities, and, in drier countries, works conveniently with the climate. It can also produce exceptionally fruity and complex flavours in the final product, and a wider range of flavours.
But there are also disadvantages: the fermentation process puts the bean at a higher risk of molding and developing defects, making it less appealing for a farmer or producer to want to put so much at stake. Additionally, it can be hard to replicate a specific flavour profile from harvest to harvest. Some people also don’t like the fermented flavours that can develop, sometimes referred to as a “barnyard” taste.
Washed (or Wet) Process
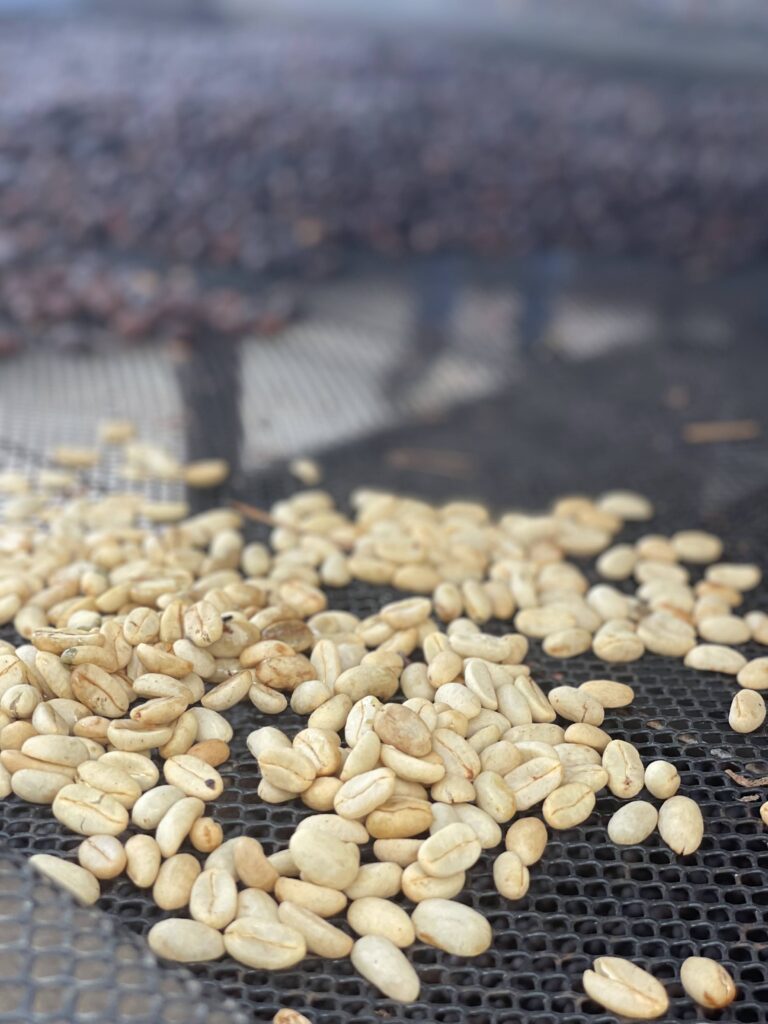
The main difference between the natural and washed process is that the washed process removes the pulp and mucilage from the bean BEFORE drying the green bean. After being picked, the cherry is depulped, leaving just the mucilage. To remove the mucilage, the bean is placed in tanks of water, creating an environment where the mucilage is eaten away by naturally present bacteria over the course of a couple days. The bean is then rinsed of mucilage, dried in raised beds or mechanically, and then dry-hulled to remove the final parchment layer.
Since producers have greater control over each variable in the washed process, flavour profiles are easier to replicate and there is lower risk of defects in each batch. People enjoy the clean, bright, and light-bodied flavours that are often (but not always) representative of washed process beans. On the flip side, washed processes require specific facilities and equipment, and large amounts of water, which can be very costly for farmers.
Honey Process
This process is often described as landing somewhere between the natural and washed processes. Like the washed process, the cherry is depulped after being picked. But, instead of removing the mucilage, the bean is both fermented and then dried with the mucilage still intact. After the drying, the bean is dry-milled to remove the remaining layers of mucilage and parchment.
There are several types of honey process: white, yellow, red, and black. The colour refers to the amount of mucilage that is left on the bean after being depulped; white honey process means there is very little of the mucilage left, with the mucilage levels increasing all the way to black honey, the process that utilizes the most mucilage. Some growing regions use white, yellow, red, and black honey process to refer to the amount of time the sugars caramelize for during fermentation (the longer they ferment, the more they caramelize, the darker in colour).
While the honey process uses less water than the washed process and requires less equipment, it does carry higher risk of defects, just like the natural process. People enjoy honey processed beans for their unique, fruity, and complex flavours, while still maintaining crisp and clean aspects of washed process beans.
Okay, that was a lot of information.
But hopefully now when you look at a bag of beans and see the processing method indicated, it all makes sense! And now that we’ve covered the basics, we can look at some more complex processing methods. Stay tuned for next month’s post where we’ll do our best to explore the more complex processes being introduced to the specialty coffee world.
Decaf coffee gets a bad rap, especially in the specialty coffee industry; it’s been accused of tasting bad, that the processes are unhealthy, and so on. So, we thought we’d go over the different decaffeination processes to clear up some common misconceptions, and by the end, *maybe* change your mind about it.
Decaffeination occurs at the green bean stage and is most often done by the green bean importer, after processing but before roasting. According to the Government of Canada’s Food and Drug Regulations, in order for coffee to be considered “decaf,” the bean cannot be more than 0.1% caffeine. For reference, a regular caffeinated bean’s weight is 1-2% caffeine. So, while decaf coffee is not completely caffeine-free, it contains such a small amount of caffeine that it is negligible.
The earliest decaffeination process was patented by Ludwig Roselius, a German coffee merchant of the early 1900s. His process involved soaking the green beans in hot water to open the pores, then adding a solvent called benzene that would bind to the caffeine and draw it out, leaving behind a decaffeinated green bean. Benzene is no longer used to decaffeinate green beans since it’s now recognized as a carcinogen, but the principles of Roselius’ process are still used in certain decaffeination processes today.
Decaffeination Processes
There are 3 main processes used today:
1. Chemical Process
This process relies on chemicals—the two main ones being methylene chloride and ethyl acetate—that bond to caffeine compounds to draw it out of the bean. First, the green bean is soaked in hot water or steamed, and then rinsed with either methylene chloride or ethyl acetate, which bond selectively with the caffeine compound. The beans go through a number of these chemical washes to extract as much caffeine as possible, then steamed again to remove any remaining chemicals from the bean. Finally, the bean is dried again, ready to be roasted.

Methylene chloride is a chemical used in a variety of products, including paint stripper. There have been concerns regarding the consumption of such a chemical; however, very little of it actually ends up in the final product. Most remaining methylene chloride evaporates during roasting, and any of the chemical that manages to survive is not harmful in that quantity. The alternative to methylene chloride is ethyl acetate, which is a naturally occurring chemical compound. In ripe fruit, it’s the chemical that produces the sweet smell, and it’s also a by-product of sugarcane processing. Some coffee producers in Colombia, where sugarcane is processed, are able to decaffeinate their beans themselves. More often than not, though, a synthetic version of ethyl acetate is used since it’s less expensive. Coffees that are decaffeinated with ethyl acetate are often referred to as the “Sugarcane Process” or “EA Process.”
2. Water Process
The water process relies solely on water to extract caffeine from green beans. To begin, the beans are soaked in hot water to extract all soluble materials—flavour compounds included. These beans are then discarded. The water with the bean solubles is then filtered (usually with a carbon filter or activated charcoal) to separate caffeine compounds from everything else in the water. Then, a new batch of caffeinated green beans are immersed in the water without caffeine. The caffeine in the beans diffuses into the water while keeping its own flavour compounds since the water already contains an equal amount of flavour compounds. The beans are then dried and ready for roasting.
On bags, the water process will often be referred to as “Swiss Water Process,” which is actually a patented name, specifically done by the green bean importer Swiss Water. Other companies that do water processing will likely just call the process a “Water Process.”
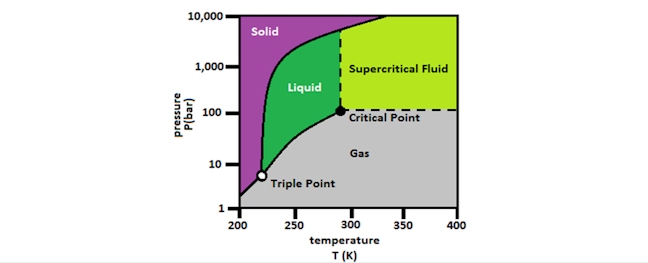
3. Supercritical CO2 Method
This decaffeination process uses carbon dioxide in place of chemicals or water. At a specific temperature and pressure, called the critical point, CO2 becomes a liquid. Above its critical point, the CO2 molecule is no longer strictly a liquid or a gas but has properties of both—called a “supercritical fluid” (i.e. sCO2)—and can act as a solvent.
Once again, this process begins by soaking the green beans in hot water to open its pores. Then the beans are placed in a stainless-steel container, which is then sealed, and sCO2 is introduced into the vessel. The sCO2 draws caffeine out of the bean, leaving behind everything else, and then scrubbed of caffeine so it can then be recirculated to extract more caffeine from the green beans. At the end of the process, the sCO2 is moved to another vessel where the pressure of the container is released, and the sCO2 returns to its gaseous state, to be re-used.
Conclusion
Decaffeination processes have come a long way over the last 100 years. Thanks to more recent and exact processes, decaf beans arguably don’t taste worse simply by virtue of being decaffeinated. There are certainly advantages and disadvantages to each kind of process, though. For example, the chemical EA process has a lower environmental impact than the water process, but some say ethyl acetate does affect the flavour of the bean. The water process is gentler and preserves many of the original flavours and aromas but has a higher environmental impact and is more costly. The supercritical CO2 process is quite rare since it requires incredibly specific equipment and set-up, and is very expensive, but since it’s highly selective in the compounds it extracts, much of the original flavour is maintained. So, once more, and as we at Doorstep Barista always say, all that matters is your own preference when it comes to your coffee.
What is coffee cupping, you ask? And how can you, as an at-home barista, use it? Let us tell you!
Definition
Cupping refers to the standard method used in the coffee industry to taste and evaluate beans. It’s a stripped-down brewing method that requires as little equipment as possible making it accessible at every level of the farm-to-cup process, and with as few variables as possible. From some producers to green bean buyers to roasters to baristas, cupping is used as a form of assessment, quality control, and palate development.
Equipment
Required equipment includes a scale, a grinder, a cupping bowl, and a cupping spoon. A cupping bowl is either ceramic or tempered glass and should hold approximately 200 mL of water, while a cupping spoon is wider and heavier than a normal spoon, and generally made of nicer materials so as not to impart flavours or modify the mouthfeel.
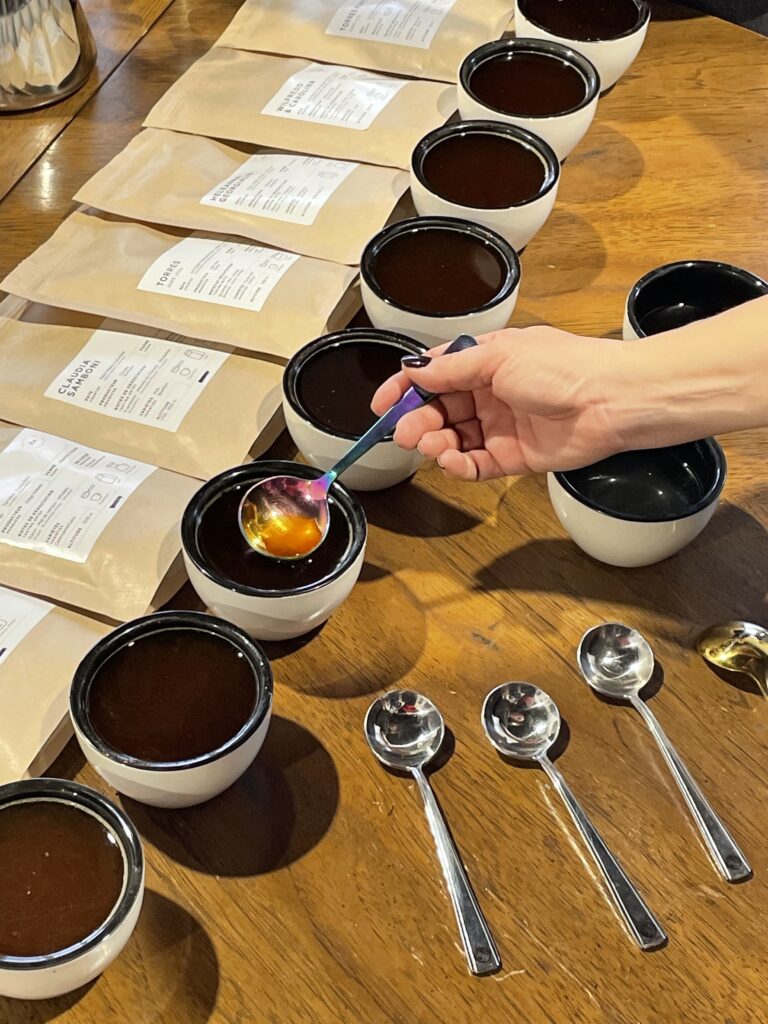
Process
At the end of this article is an exact process, but here is the general rundown of how a cupping works. First, a small amount of beans is weighed out, ground at a medium coarseness, and placed in a cupping bowl. The grounds are then steeped in hot water. As it steeps, some of the grounds float to the top of the bowl, forming what is known as the “crust.” At around 4 minutes, the crust is broken with a cupping spoon, and it’s at this stage that the coffee’s fragrance is usually evaluated. Then the crust is scooped out and the remaining coffee is allowed to cool slightly before tasting. To taste, a small amount of coffee is scooped out with a cupping spoon and then slurped (the louder the better!) by the taster. Slurping ensures the coffee is aerated and covers as much of the taster’s palate as possible in order to taste all its nuances. As cuppings are most frequently used to taste multiple coffees alongside each other, ensure to dip the spoon in a rinse cup between each tasting. (If you’re interested in official technicalities, here is the protocol put forward by the SCA.)
Why and when do cuppings occur?
When cupping, it depends why you’re cupping to determine which elements you want to pay attention to. Many coffee professionals, including Q-graders, utilize the Specialty Coffee Association’s (SCA) scoring sheet to assign cupping scores and issue scoring certificates—but that’s is a whole OTHER blog post. Like we mentioned earlier, cupping is used at every stage of the coffee production chain for a variety of reasons. Coffee producers sometimes use cupping as a form of quality control to check for defects in their crops. We will note, however, that this is a rare occurrence, and often producers don’t actually know what their crops taste like. Green bean buyers will cup when looking for lots to purchase. They are looking for qualities they think roasters and consumers will be interested in, while also ensuring there are no defects. Even though green buyers are tasting roasted beans, they are attempting to look past the roast and taste qualities of the green bean. Then, at the roasting stage, roasters will cup to assess their different roast profiles and make adjustments. Baristas will cup coffees to develop their palates, and even compete in tasting competitions!
And finally: For us at-home baristas, cupping is a good way to taste two or three coffees side-by-side to develop our palates. We recommend starting by noticing differences in the coffees—how are they different? How would you describe it? Not only does this help develop your palate, it’s also a great way to expand your coffee vocabulary. When noticing the taste, what flavour notes are present? Do they last all the way from the first taste to aftertaste, or do they evolve? When noticing the mouthfeel, is it light and tea-like, or robust and rich? Is the coffee balanced, or are some elements more noticeable than others?
How to Taste
Here are some basic elements you can focus on to get a solid, well-rounded sense of a coffee. We’ve drawn from the SCA’s scoring sheet, but since we’re focusing on tasting practice and personal preference and not on scoring, this is a modified list of qualities to focus on.
Fragrance: What the dry coffee grounds smell like.
Aroma: What the coffee smells like when the crust is broken.
Flavour: Tasting notes. (You can find the SCA’s tasting wheel here.)
Aftertaste: Length of flavour once swallowed and the pleasantness of the aftertaste.
Acidity: While yes, acidity is inherent to coffee and affected by origin, different processing methods and roast profiles will alter the intensity of a coffee’s acidity. A more intense acidity will often manifest in descriptions such as “bright,” “lively,” and citrusy tasting notes, while lower acidity coffees might be described as “nutty” or “mellow.”
Body: Refers to the mouthfeel, or the physical qualities, of a coffee. Here, you would be evaluating the viscosity, density, and generally how it feels on your palate. A lighter body might have descriptions like “tea-like” or “delicate,” and fuller bodied coffees might be described as “rich,” “velvety,” or “syrupy.”
Balance: Between acidity, aroma, flavour, and body. Is one more prominent than the other? Are they all equally present?
Sweetness: Sweetness, like acidity, can also be affected by origin, varietal, processing, and roasting. This often manifests in terms of fruit and chocolate tasting notes.
Overall: This is your overall impression and biased opinion; as we always preach, personal preference trumps everything. What matters is that you like it!
How does Doorstep Barista use cupping?
Here at Doorstep Barista, we use cupping to match coffees to our six different taste profiles. When we partner with roasters, we request samples to cup. While cupping, we make sure to have a “control” coffee, which is a coffee that we taste alongside every sample from every roaster to ensure as much consistency as possible in our matching of coffees to taste profiles. Our control ranks at a 4 on the spectrum of our taste profiles. We take extreme care to do this with each sample to make sure you only get coffee you love!
As promised, here is an exact cupping process to follow so you can try it at home!
Equipment:
- A scale
- Cupping spoon or soup spoon
- Cupping bowl or small bowl made of ceramic or tempered glass; one for each coffee you are cupping, and one with hot water for rinsing in between tastes.
- Hot water
- Coffee(s)!!
Instructions
- Weigh out 11 g of coffee.
- Grind at a medium coarseness and place in cupping bowl.
- Place cupping bowl on scale and pour 200 g of hot water over the grounds, ensuring to evenly wet the coffee. Start a timer for 4 minutes.
- Once 4 minutes is up, break the crust with the back of cupping spoon. Then scoop the crust out and discard. Rinse cupping spoon.
- Allow coffee to cool slightly before scooping a small amount out and slurping to taste.
- Note what you taste and your personal preferences!
It’s the middle of July, and here in Edmonton we’re starting to hit the REALLY hot, humid days of summer. A hot coffee just doesn’t seem as appealing when you’re sweating in the heat. Try cold brew instead! It’s the perfect summer drink for coffee lovers; not only is it super refreshing on a sweltering day, but the slow extraction of the cold brewing process results in a rich, smooth flavor.
What Is Cold Brew?
Cold brew is similar to iced coffee, yet brewed differently. While conventional iced coffee is made by brewing hot coffee and then pouring it over ice, cold brew is made by slowly steeping the coffee grounds in cold or room temperature water for several hours.

Cold brewing reduces the acidity of coffee, in turn enhancing the natural flavour notes of the beans. The lower acidity is great for those with sensitive stomachs or who prefer a smoother brew. Many who typically add cream and sugar to hot coffee are happy to drink their cold brew straight. Plus, regular coffee usually tastes stale after a day, while cold brew coffee stays fresh for up to a week when refrigerated.
Caffeine levels are generally a bit higher in cold brew than regular coffee, due to the longer steeping time, however cold brew can be just as tasty with decaffeinated beans.
How To Make Cold Brew
You don’t need any fancy gear or instruments to make your own cold brew; chances are you already have everything you need at home. Though, the better quality your coffee beans are to start, the tastier your drink will be. A simple container, a coarse ground coffee and a way to filter out the beans are all you need, though if you have it, a French Press can make the whole process even simpler.
Ingredients
Cold brew is just coffee beans and water, right? Simple. At least in theory.
In reality, every new search for a cold brew recipe will give you a different ratio of ground coffee beans to water, everything from 1:3 parts ground coffee to water (i.e. 1 cup coffee and 3 cups water), all the way to 1:16 parts coffee to water.
At our cafes, we typically use a 1:5 ratio to make a Cold Brew concentrate (1 cup whole beans to 5 cups of water). Then when we’re ready to serve it, we mix 1 part cold brew concentrate to 2 parts water.
Starting with a concentrate gives us the flexibility to easily switch up drink recipes; if you’re going to make iced lattes with your cold brew, it’s good to start with a stronger concentration so the milk won’t dilute the coffee too much.
Try different ratios and see which works best for you.
Cold Brew ‘Gear’
- – Coffee grinder (optional)
- – Cold or room temperature water
- – A large jar or container for soaking the coffee grounds. You may also want a second container to store the cold brew.
- – A strainer: You can use a fine mesh sieve or coffee filter. A French Press is perfect if you have it.

Instructions
1. Grind your beans on the coarsest setting. If you’re a Doorstep Barista subscriber and happen to be in the Edmonton area, we’re happy to grind your cold brew beans for you at either of our Square One cafes.
2. Combine your water and ground coffee in a large, covered jar or French Press. You can use a long handled spoon to press the beans down into the water to ensure they’re completely saturated.
3. Cover the container and let it steep in the refrigerator for 12-18 hours (or up to 24 hours if you prefer a stronger brew). If you’re using a French Press, mix the coffee and water in the chamber and then, without pressing the plunger down, place the French Press in the refrigerator to steep.
Blooming the coffee: Some people like to steep the grounds in a cup of hot water for up to 10 minutes before topping the beans off with cold water, a process called ‘blooming’. It’s thought by some that this gives the coffee a more developed flavour. Try both ways and decide which you prefer!
4. Strain the beans. With its built-in filter, a French Press makes cold brewing super simple. When you’re done steeping, slowly press the plunger down. You can drink as is, or pour the brew through a second, finer coffee filter to remove any leftover sediment.
If you’re doing the jar method, simply strain the coffee through a fine-mesh strainer into a clean container. You can also pour the mixture through a coffee filter, cheesecloth or even a clean dish towel if you find yourself stuck without a sieve. Discard the used coffee grounds.
5. Store your freshly made cold brew in a sealed, air-tight container in the fridge for up to 7-10 days.

How To Drink Cold Brew
Cold brew is delicious, no matter how you drink it. Serve the coffee plain or over ice. It’s delicious black, or add a dash of milk or cream. If you prefer your coffee a bit sweeter, honey, maple syrup or a simple syrup will mix into your cold coffee easier than granulated sugar.
And if you make a concentrate, it’s really nice to mix with club soda. You can also add gin or other bitters to cold brew to make a great, fun cocktail!
We hope we’ve inspired you to give cold brew a try! You don’t need to be a professional barista to enjoy cafe-quality cold brew at home and it makes the summer heat a lot more bearable. Make a fresh batch before you go to bed and wake up to delicious cold brew for your morning coffee fix.